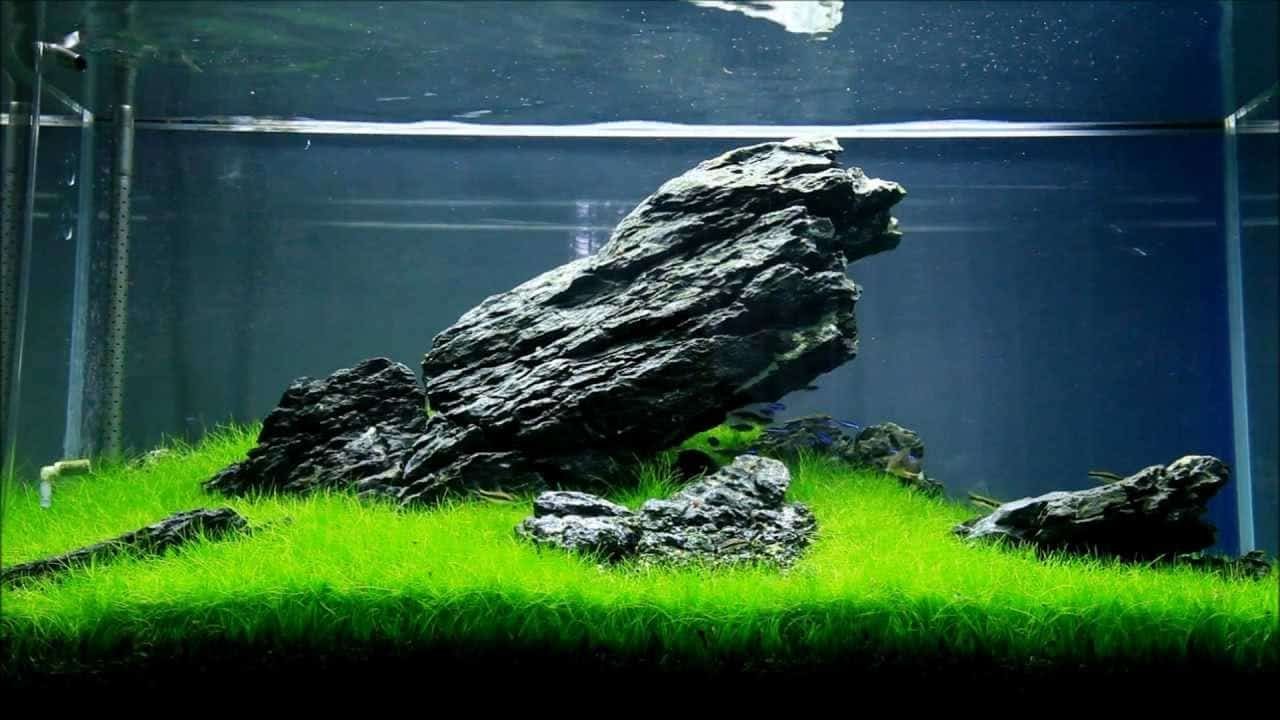
Most aquascaping guide for beginners content makes the same mistake: it pushes you toward Iwagumi as if that’s the "real" aquascape, then watches you give up six weeks later when your carpet plants melt and algae coats the rocks. I’ve watched too many friends quit the hobby because they tried to build a contest scape on their first tank. The truth is simpler. Pick the right style for a first build, get the hardscape composition right, lean on bulletproof low-tech plants, and your first aquascape will look great in three months. No CO2 cylinder required.
Disclosure: This post contains affiliate links. If you purchase through a link on this page, we may earn a small commission at no extra cost to you. We only recommend products we’d use in our own tanks.
Beginner Aquascape Style Selection: Pick Yours Before Anything Else
Beginner aquascape style selection is the first decision because it determines everything downstream: which hardscape you buy, which plants survive, whether you need CO2, and how forgiving your tank will be when you inevitably make beginner mistakes. Get this wrong and you’ll spend six months fighting your setup.
There are five canonical aquascaping styles. Here’s how they rank for beginners, based on consensus across School of Scape, Aquascaping Love, BucePlant, and 2Hr Aquarist:
| Style | Difficulty | CO2 Required? | First Tank? |
|---|---|---|---|
| Nature Aquarium | Beginner | Optional | Yes |
| Jungle | Beginner | No | Yes |
| Simplified Dutch | Intermediate | Optional | With patience |
| Biotope (loose) | Intermediate | Depends | With research |
| Iwagumi | Advanced | Yes | No |
Iwagumi deserves a specific warning. It looks deceptively simple. Three rocks in a carpet of dwarf hairgrass. How hard could it be? The answer: very. Iwagumi is the most compositionally unforgiving style in the hobby because there’s nowhere to hide a mistake. Patchy carpet, badly placed stones, or a single algae outbreak immediately destroys the entire composition. It also demands high light, pressurized CO2, and full fertilization. Save Iwagumi for your third or fourth tank.
Why Nature Aquarium Is the Canonical Beginner Style
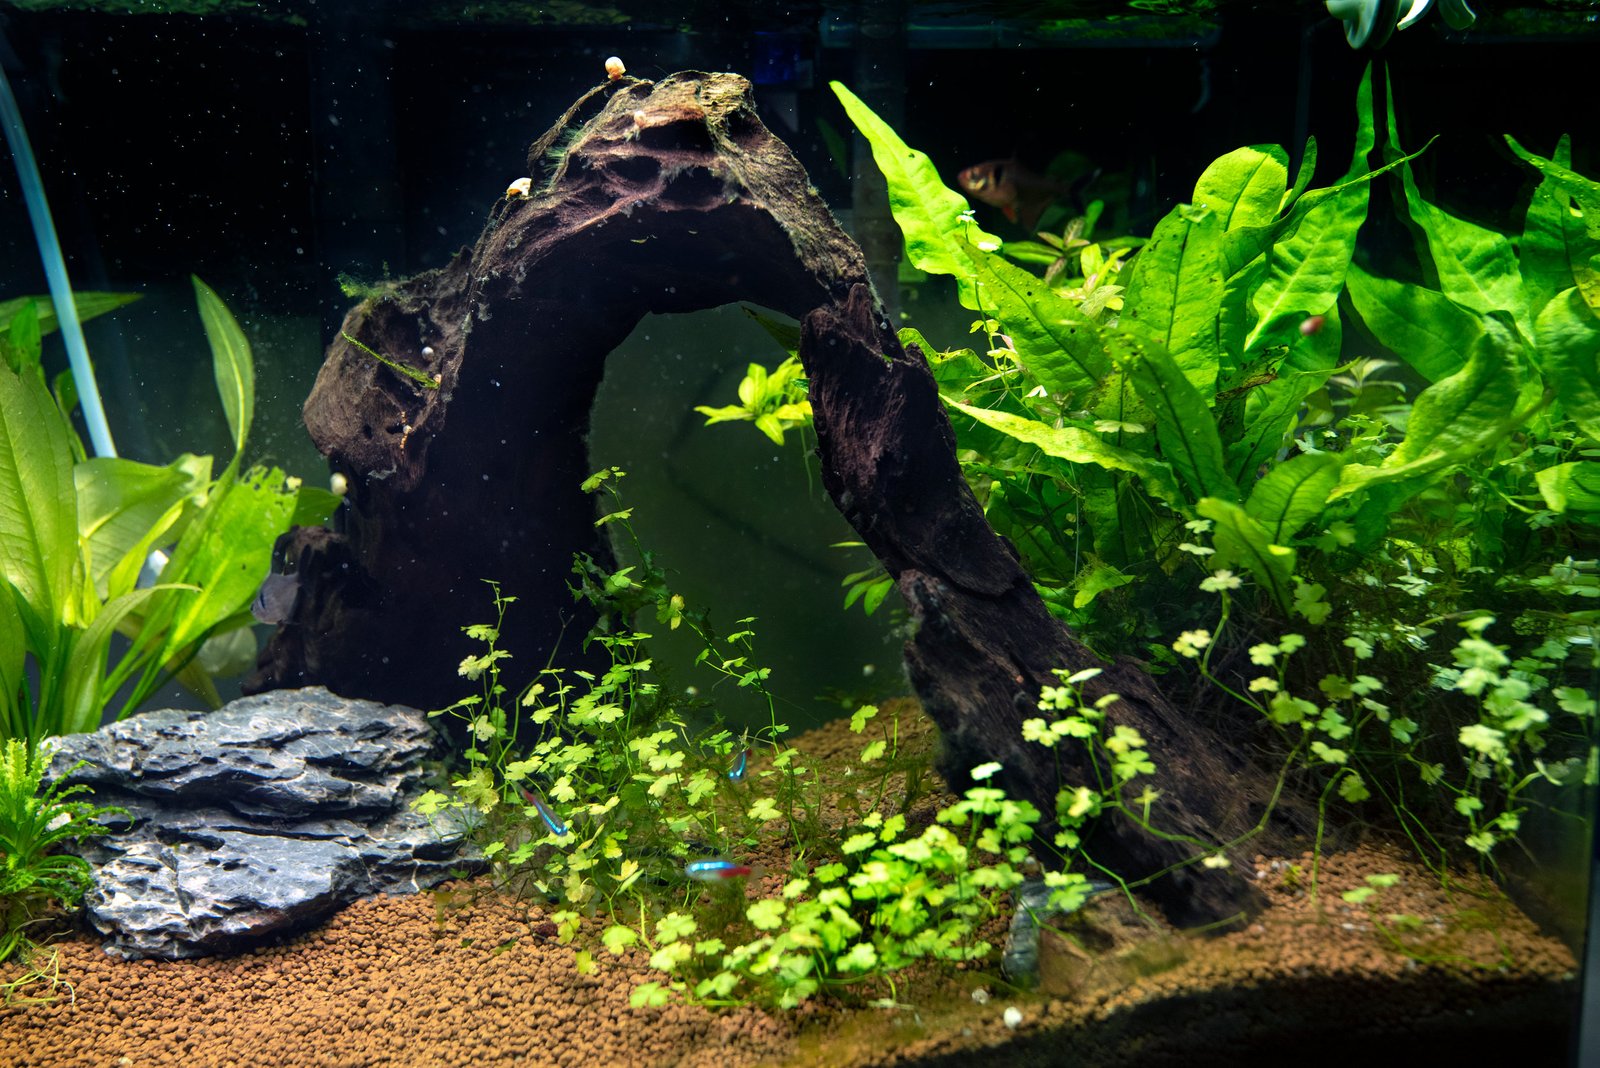
Nature Aquarium is the style Takashi Amano developed, and his guiding philosophy was “learn from nature.” The goal isn’t a stylized garden or a minimalist sculpture. It’s a slice of forest stream, riverbank, or mountain valley that looks so authentic the viewer thinks they’re peering into a real corner of the wild.
This style works for beginners because of three forgiving traits. First, asymmetry and organic composition mean you’re not chasing geometric precision. Second, dense planting hides hardscape mistakes and outcompetes algae. Third, Nature Aquarium accommodates both high-tech and low-tech approaches equally well. You can start with no CO2 using Anubias, Java Fern, and Cryptocoryne, and then add a pressurized system later if you want to expand your plant palette.
Jungle style is the other beginner-friendly option. It’s even more forgiving than Nature Aquarium because dense overgrowth literally hides every flaw, and the easy fast-growing plants that define the style work fine without CO2. The trade-off is heavier maintenance and a less polished aesthetic. For most beginners, I recommend starting with a Nature Aquarium layout and letting it grow toward jungle density over time.
Tank Dimensions Matter More Than Volume
Beginner buying advice usually focuses on gallons. That’s the wrong metric for aquascaping. Footprint matters more than volume because aquascaping happens in the horizontal plane. A 60-gallon tank with a 48-inch length is a great aquascaping canvas. A 60-gallon tall column with a 16-inch length is almost unusable.
The rule of thumb: aim for a length-to-height ratio of at least 1.5:1. Anything taller and shallower wastes water column on empty vertical space.
For first builds, the ADA standard sizes are useful references. The 45P (45×30×30 cm, about 10 gallons) is the canonical nano aquascape size. The 60P (60×30×36 cm, about 17 gallons) is the most popular aquascape size in the world for good reason. Both have the right proportions and offer enough water volume to be forgiving when parameters swing.
Hardscape Composition Principles: The Bones of Every Aquascape
Hardscape (rocks and driftwood) is the skeleton your aquascape hangs on. Plants come and go, but the hardscape stays. Get this right and your tank looks like an aquascape even before the plants grow in.
Six composition principles separate good aquascapes from amateur ones. They all trace back to landscape painting and photography, and they all apply regardless of style:
- Rule of thirds. Place focal elements at the intersections of imaginary vertical and horizontal thirds, not at the center. Centered focal points feel static and amateurish.
- Golden ratio (1:1.618). Place your primary focal point at roughly 0.618 of the tank length. It feels naturally balanced even when viewers can’t articulate why.
- Single focal point. For tanks under 30 gallons, commit to one focal point. Multiple focals require hierarchy and are harder to balance.
- Depth via layers. Create distinct foreground, midground, and background zones. Sloped substrate (shallow front, deeper back) combined with larger hardscape toward the front amplifies the depth illusion.
- Odd-numbered groupings. Use 3, 5, or 7 stones, never 2, 4, or 6. Odd numbers force asymmetry; even numbers create unsatisfying visual balance.
- Avoid the flat back-wall. Don’t line up all hardscape against the back glass. Extend pieces forward into the tank to create spatial complexity.
Most beginner scapes fail one or two of these. Centered rocks, all hardscape against the back glass, even-numbered groupings, no depth. Fixing those four mistakes alone will put your first scape ahead of 80% of first-tank attempts.
Picking Rocks: Avoid Seiryu on Your First Tank
Seiryu stone is the iconic blue-gray rock you see in every contest aquascape. It’s also limestone, which means it continuously raises pH and water hardness over months and years. For Iwagumi-style hard-water setups or African cichlid tanks, that’s fine. For a beginner community tank, it’s a trap.
Dragon Stone (also called Ohko stone) is the beginner-safe alternative. It’s porous, lightweight, chemistry-neutral, and dramatic-looking. Lava rock is another inert option with maximum surface area for biological filtration. For any unknown rock you’ve collected, do the vinegar test: drop white vinegar on it, and if it fizzes, it’s limestone and will buffer pH up. No fizz means chemistry-neutral.
For a deeper dive into rock and wood selection for planted tanks, our guide to aquarium driftwood types covers the full Mopani vs. Spiderwood vs. Manzanita comparison.
Picking Driftwood: Spider Wood and Manzanita for Beginners
Spider Wood is the most popular aquascaping driftwood because of its intricate branching. It releases moderate tannins for 4-8 weeks, and it won’t sink without pre-treatment. Either boil it for 15-30 minutes or weight it down with rock until it saturates.
Manzanita is the premium choice. Cleaner aesthetic, faster tannin depletion (2-4 weeks), beautiful golden-to-reddish coloration. It’s more expensive but worth it if you want crystal-clear water from day one.
Mopani is heavy African hardwood that sinks immediately but leaches tannins for 3-6 months. It’s great for blackwater biotopes and large tanks where you want a dominant, dark wood. For a typical beginner Nature Aquarium, Spider Wood is the right starting point.
Substrate: Aquasoil vs. Inert with Root Tabs
There are two valid paths for planted tank substrate, and the choice depends on how often you plan to rescape.
Aquasoil (ADA Amazonia, UNS Controsoil, Fluval Stratum) is baked nutrient-rich soil granules. Plants grow more robustly because the substrate is pre-loaded with ammonia and nutrients. The trade-off: aquasoil leaches ammonia for the first 2-3 weeks, which is incompatible with instant fish-in stocking. You have to cycle the tank first. Active nutrient supply runs about 4-6 months; useful organic-matter and porosity benefits last years.
Inert substrate plus root tabs (pea gravel, pool filter sand, or aquarium gravel with Seachem or API root tabs) is the budget-friendly, rescape-friendly path. No ammonia leach window means you can stock fish almost immediately after cycling. Easier to vacuum. Easier to tear down and rebuild. The trade-off: root tabs work less effectively than aquasoil because inert substrates let minerals leach into the water column instead of binding them in the root zone.
My recommendation for first tanks: aquasoil if you’re committed to keeping the scape for 12+ months and want maximum plant performance. Inert plus root tabs if you want to experiment, rescape often, or stock fish quickly. Both are legitimate. For the full comparison and product recommendations, see our guide to substrate for planted tanks and our piece on whether plants grow in gravel.
Low-Tech Beginner Aquarium Plants That Actually Work
For a no-CO2 beginner tank, you want plants that thrive under medium light, tolerate parameter swings, and don’t demand fertilization perfection. These seven species are the canonical low-tech palette:
| Plant | Placement | Notes |
|---|---|---|
| Java Fern | Midground / on hardscape | Rhizome must stay above substrate |
| Anubias (nana/barteri) | Midground / on hardscape | Same rhizome rule; algae-prone under high light |
| Cryptocoryne wendtii | Midground | “Crypt melt” on transition is normal |
| Amazon Sword | Background / centerpiece | Heavy root feeder; needs root tabs in inert |
| Vallisneria | Background | Hard-water friendly; sensitive to Excel/liquid carbon |
| Hornwort | Floating | Rootless; fast nitrate uptake; ideal during cycling |
| Java Moss | On hardscape / foreground | Tolerates almost any water; attaches to anything |
For attachment, cyanoacrylate gel (Loctite Super Glue Gel Control, Seachem Flourish Glue, or any aquascaping-specific gel glue) is the modern standard. Apply a dab to the rhizome, press it against the wood or rock for 30-60 seconds, and it’s permanent. Cotton thread is the biodegradable alternative; wrap the plant in place, and the thread dissolves over 4-8 weeks as the plant’s own roots take hold.
One more thing about nursery plants: most aquatic plants are grown emersed (above water) in commercial greenhouses, then sold submerged. The emersed leaves often melt off in the first few weeks as the plant grows new submerged leaves. This is normal. For more context on why this happens, our guide to emersed vs. submerged plants walks through the biology.
Lighting: Why Dimmable Is the Single Most Important Spec
Lighting is where most beginner planted tanks fail. The standard story: someone buys a premium high-output LED fixture, runs it at 100% for 10 hours a day, and within three weeks the tank is covered in black beard algae and hair algae. The fixture is fine. The problem is mismatched lighting tier.
Modern planted tank lighting is measured in PAR (photosynthetically active radiation, in µmol/m²/s) at substrate level, not fixture wattage. The current consensus tiers:
- Low light: 10-30 PAR at substrate. No CO2 required. Anubias, Java Fern, Cryptocoryne, mosses.
- Medium light: 30-50 PAR at substrate. CO2 optional at the high end. Most stem plants, Amazon Sword, Vallisneria.
- High light: 50+ PAR at substrate. CO2 mandatory. Carpets, demanding red stems.
For a beginner low-tech tank, target 20-35 PAR at substrate. That’s enough to grow the species in the table above without forcing you into CO2 supplementation.
Here’s the critical insight: a dimmable LED is the single cheapest algae-prevention tool you can buy. The reason is that mismatched lighting (too much light without enough CO2 and nutrients) is the number-one cause of algae problems in planted tanks. Running a high-output fixture at 50% intensity transforms it from a high-tech demand into a forgiving low-tech setup.
Dimmable LED Recommendations
Chihiros B Series Full-Spectrum Dimmable LED
Best For: Beginner Nature Aquarium builds in 60-80cm tanks where dimming to match a no-CO2 setup is the priority
For tanks in the 60-80cm range, the Chihiros B Series full-spectrum dimmable LED is a strong beginner pick. App-controlled dimming, full-spectrum coverage suitable for planted tanks, and the ability to dial intensity down to 50% (or less) makes it ideal for matching your no-CO2 setup. The key feature isn’t peak output; it’s the dimming range.
The honest caveat: the app-based controls have a learning curve, and the lower-end models in the line don’t push enough PAR for demanding high-tech setups. If you plan to eventually run a CO2-injected carpet scape, you’ll likely outgrow this fixture and need to step up to a higher-output model.
Pros
- Dimmable range is wide enough to match a no-CO2 setup at 50% or lower
- Full-spectrum coverage suitable for the low-tech plant palette in this guide
- App control lets you schedule sunrise/sunset ramps and dial photoperiod without a separate timer
- Fits the canonical 60P beginner aquascape size
Cons
- App-based controls have a setup learning curve compared to a simple wall timer
- Lower-end models in the line aren’t bright enough for future high-tech upgrades
- Priced higher than basic non-dimmable LEDs you might find in starter kits
Current USA Satellite Freshwater LED Plus
Best For: Smaller 18-24″ tanks (typically 10-20 gallons) where a built-in timer is more convenient than app pairing
For 18-24″ tanks (typically 10-20 gallons), the Current USA Satellite Freshwater LED Plus is a long-standing beginner favorite. It has programmable color modes, adjustable intensity, and a built-in timer. Not the absolute highest-output fixture on the market, but the right output range for a low-tech Nature Aquarium build.
The honest caveat: output drops off significantly past 18 inches of water depth, so if your tank is on the deeper side of this range, plants near the substrate will be in low-light territory. Also, the built-in remote can feel dated compared to app-based fixtures.
Pros
- Built-in timer and intensity controls don’t require a smartphone app
- Right output range for a low-tech Nature Aquarium in a 10-20 gallon footprint
- Programmable color modes let you tune for plant growth or aesthetic viewing
- Long-standing reputation as a beginner-friendly fixture
Cons
- Output drops off past 18 inches of water depth, limiting plant choices in deeper tanks
- Remote-based control feels dated compared to modern app-controlled fixtures
- Not enough PAR for demanding high-tech setups or future carpet scapes
For the broader picture on fixture selection across tank sizes and plant tiers, our guide to LED aquarium lighting covers the full landscape.
CO2: Optional, Not Required
Here’s where many beginner aquascaping guides go wrong: they push pressurized CO2 as if it’s mandatory. It isn’t. For the low-tech plant palette in this guide (Anubias, Java Fern, Cryptocoryne, Vallisneria, Amazon Sword, Hornwort, Java Moss), CO2 is genuinely optional. The plants will grow without it.
CO2 becomes necessary when you upgrade to demanding carpet plants (dwarf hairgrass, Monte Carlo, HC), red stem plants, or any high-light setup. For your first tank, skip CO2. See how the low-tech setup performs over six months. If you want to expand into more demanding species later, add a pressurized system then.
One warning: liquid carbon supplements (Seachem Excel, EasyLife EasyCarbo) are sometimes marketed as a CO2 substitute. They aren’t. They provide organic carbon, not dissolved gaseous CO2. They also damage Vallisneria, mosses, and Hornwort at full manufacturer dose. For a low-tech beginner tank with the plant palette above, skip liquid carbon entirely.
Beginner Aquascape Setup Workflow: From Empty Tank to First Fish
Here’s the workflow I’d follow for a first low-tech Nature Aquarium build:
- Place the tank on a level, rated aquarium stand. Verify level in both directions. A full 20-gallon tank weighs about 200 pounds; the stand has to handle it.
- Dry-scape your hardscape outside the tank first. Arrange rocks and driftwood on a table or the floor, photograph multiple iterations, and commit only when you have a layout you’re happy with. This step alone saves more first scapes than any other planning move.
- Pre-rinse and pre-soak your hardscape. Wash rocks in hot water with a stiff brush. Pre-soak driftwood for several days to start tannin release and waterlogging.
- Install substrate, sloping front-to-back. Shallow (2-3 cm) at the front, deeper (4-7 cm) at the back. The slope creates depth perception.
- Place the hardscape on top of the substrate. Bury 10-30% of large stones to suggest geological continuity. Don’t let hardscape line up against the back glass.
- Half-fill the tank slowly. Place a plate or shallow bowl on the substrate and pour water onto it to minimize disturbance.
- Plant with tweezers. Foreground and midground first (rosette plants like Cryptocoryne, attached plants like Anubias and Java Fern). Background stems last. Floating plants (Hornwort) added once the tank is filled.
- Fill the rest of the way, install heater and filter. Verify temperature, flow, and filter operation.
- Cycle the tank before adding fish. Aquasoil tanks need extra-aggressive water changes during the first two weeks to manage the ammonia leach. Shirley Aquatics recommends 50% water changes every other day for the first two weeks, then every three days for weeks 3-4, then weekly.
Cycling takes 4-6 weeks. Test ammonia, nitrite, nitrate, and pH daily. Cycle is complete when ammonia and nitrite both read zero within 24 hours of dosing/feeding, with measurable nitrate present. For the full cycling and first-tank walkthrough, see our guide to setting up your first aquarium.
Common Beginner Aquascaping Mistakes (and How to Avoid Them)
Here are the mistakes I see most often, in order of damage:
- Burying Anubias or Java Fern rhizome. Kills the plant within weeks. Attach to hardscape instead.
- Running a high-PAR fixture at 100% over a no-CO2 tank. Algae bloom within 2-3 weeks. Dim to 50% or shorten photoperiod to 6 hours.
- All hardscape lined up against the back glass. Kills depth. Extend pieces forward.
- Centered focal point. Move it to the 0.618 golden-ratio position.
- Even-numbered stone groupings (2, 4, 6). Always odd: 3, 5, or 7.
- Mixing aesthetic styles in one tank. Iwagumi rocks plus jungle density plus Dutch plant streets reads as visual confusion. Pick one style and commit.
- Planting too densely at the start. Runner plants (Vallisneria, Cryptocoryne) need space to spread. Our guide on planting density covers the trade-offs.
- Expecting instant maturity. Most aquascapes need 2-3 months of growth before they look like the photo. Be patient.
Recommended Low-Tech Beginner Nature Aquarium Build
Here’s a concrete, buildable spec for a first low-tech Nature Aquarium:
- Tank: 20-29 gallon long-and-shallow (ideally 30″ length, like a standard 29-gallon)
- Hardscape: Dragon Stone (3-5 pieces, odd number) plus Spider Wood (1-2 pieces)
- Substrate: Aquasoil (ADA Amazonia or Fluval Stratum) for max performance, OR inert sand/gravel with Seachem root tabs for budget builds
- Lighting: Dimmable LED fixture (Chihiros B Series for 60-80cm tanks, Current USA Satellite for shorter tanks), run at 50% intensity, 6-8 hour photoperiod
- Plants: Java Fern and Anubias on hardscape, Cryptocoryne wendtii midground, Vallisneria background corner, Hornwort floating during cycle
- CO2: None
- Filter: Standard HOB or canister rated for the tank size
- Stocking: Lightly stocked community fish (small tetras, rasboras, corydoras) after the 4-6 week cycle completes
Total realistic cost (excluding fish): $300-600 depending on substrate choice and tank quality. The Chihiros LED is the single most important purchase because dimming saves you from algae.
Chihiros B Series Full-Spectrum Dimmable LED
Dimmable, full-spectrum, app-controlled, and built for planted tanks in the 60-80cm range. The dimming feature is the single most important spec for a beginner because it lets you match light intensity to a no-CO2 setup and avoid the algae bloom that kills most first tanks.
Frequently Asked Questions
How long until my aquascape looks mature?
Most aquascapes need 2-3 months of growth before they fill in. Crypts take longer to recover from initial melt, Vallisneria runners take 4-8 weeks to spread, and Java Fern grows slowly year-round. Be patient and resist the urge to add more plants because the tank looks sparse at week two.
Do I need CO2 for a beginner aquascape?
No. The low-tech plant palette in this guide (Java Fern, Anubias, Cryptocoryne, Vallisneria, Amazon Sword, Hornwort, Java Moss) grows fine without CO2 under medium light. CO2 becomes necessary only for demanding carpets, red stems, or true high-tech setups.
Can I aquascape in a standard rimmed tank?
Yes. Rimless tanks are the aquascaping convention because the plastic frame visually crops every photograph, but a standard rimmed tank works perfectly for a first build. Save the rimless premium for your second tank once you know you’ll stick with the hobby.
What’s the cheapest way to start aquascaping?
Inert substrate (pool filter sand or aquarium gravel) plus root tabs, a standard 20-gallon rimmed tank, a budget dimmable LED, Dragon Stone and Spider Wood hardscape, and the low-tech plant palette. You can put together a credible first scape for under $250 if you’re patient about sourcing.
How do I keep algae away?
Three things, in order of impact: dim your light to match your CO2 and nutrient level, keep the photoperiod to 6-8 hours, and be patient while the tank matures. Algae problems almost always trace back to light intensity that exceeds what plants can use. Floating Hornwort during cycling also helps by absorbing excess nutrients before algae can use them.
Final Thoughts
The path to a great first aquascape isn’t about buying the most premium gear or copying a contest layout. It’s about making four good decisions: pick a beginner-friendly style (Nature Aquarium or jungle), get the hardscape composition right (rule of thirds, odd numbers, depth via layers), choose bulletproof low-tech plants, and buy a dimmable LED so you can match light to plant demand. Do those four things and your first tank will look like an aquascape within three months.
Skip the gear that doesn’t earn its keep on a first build. No pressurized CO2. No high-PAR fixture run at 100%. No Iwagumi attempts. Save those for your second or third tank, when you’ve built the intuition for how planted tanks actually behave.